Edit a take's look and sound
Updated:
On this page
You can set how the video and notes are arranged, how the notes look, the effects, the sound, and the part of the take to use, separately for each take. Your edits apply to the exported video and to the preview on the playback screen.
Open the editor
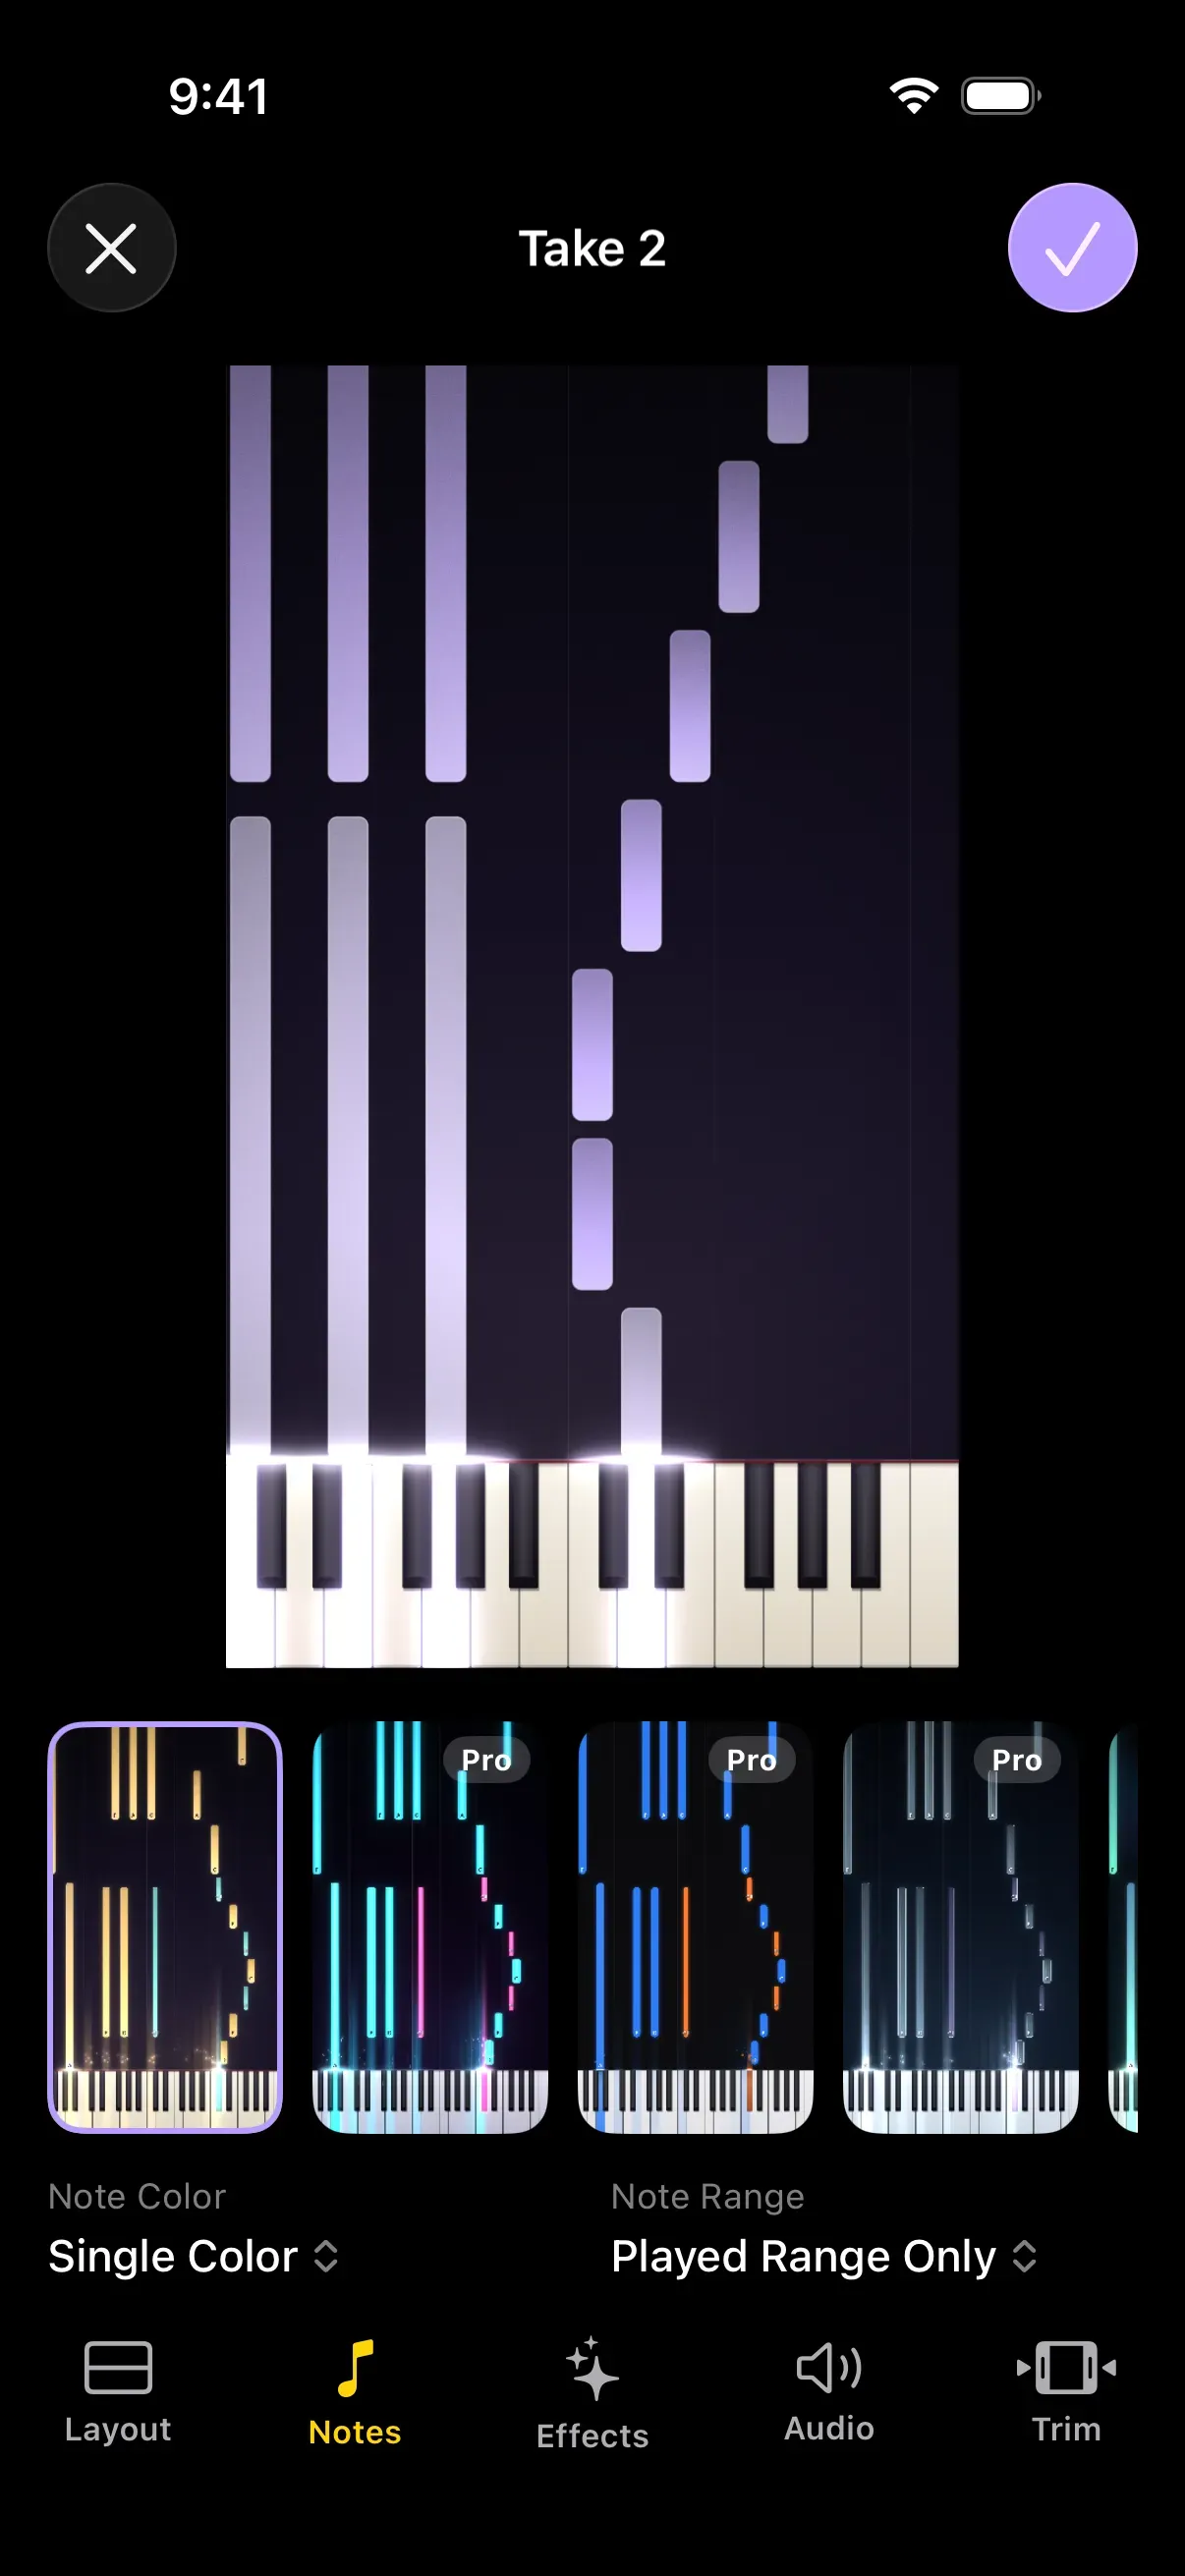
Open a take in the Library and tap Edit. In the editor, switch between Layout, Notes, Effects, Audio, and Trim to adjust the take. Tap Done in the top right to save your changes. In iOS 26 and later, Done is a button with a checkmark.
Choose a layout
Under Layout, choose the orientation and the arrangement.
- Orientation: Portrait 9:16 or Landscape 16:9
- Arrangement: Video Only shows only the footage, Split puts video and notes one above the other, and Notes Only shows just the notes
A take recorded with the camera off has no video, so only Notes Only can be chosen.
A take with no MIDI playing recorded has no notes, so it opens with Video Only, and the layouts that use notes can’t be chosen. The Notes and Effects settings can’t be changed either. On the playback screen, this take also plays with the recorded video and sound.
Choose how the notes look
Under Notes, you can choose the look of the falling notes by tapping a sample. The free version lets you choose only the glowing gold look. Looks with a Pro badge need Goldtake Pro.
You can also change these settings for the notes.
- Note Color: choose between Single Color and By Key Color. This is a Pro feature.
- Note Range: choose between Played Range Only and All 88 Keys.
Add effects
The Glowing Keys, Particles, Light Beams, Chord Names, and Note Names under Effects can each be switched on or off by tapping, and you can turn on several at once. Glowing Keys is free. The others are Pro features.
Choose the sound
Under Audio, choose the sound for the video.
| Option | What it uses |
|---|---|
| Microphone | The sound the microphone picked up while you recorded. |
| Sound | The piano sound made from the recorded MIDI. |
| Both | Both together. |
With Sound or Both, the Volume, Reverb, and Touch Sensitivity sliders on the same screen adjust the piano sound for this take. For a take without a microphone recording, or a take with no MIDI playing recorded, the Audio choice can’t be changed. A take with no MIDI playing recorded uses Microphone.
Trim the take
- Tap Trim.
- Drag the handles at both ends of the strip of frames to set the start and the end. While you drag, the preview shows the frame at that point.
The trimmed range applies to exported video, audio, and MIDI alike. Your original recording isn’t changed, so you can redo the trim later.
Leave without saving
Cancel is in the top left. In iOS 26 and later, it’s a button with an X. If you made no changes, the editor closes. If you made changes, a confirmation appears. Discard Changes returns to the take as it was, and Keep Editing returns to the editor.
In the free version, choosing a Pro option shows a Pro badge. Tap it to open the purchase screen. You can’t export the video with those options until you buy Goldtake Pro.
Was this article helpful?
Choose a reason
Thank you for your feedback.
If you still need help, use the contact form.