Tour of the capture screen
Updated:
This article explains how to read the Goldtake screen.
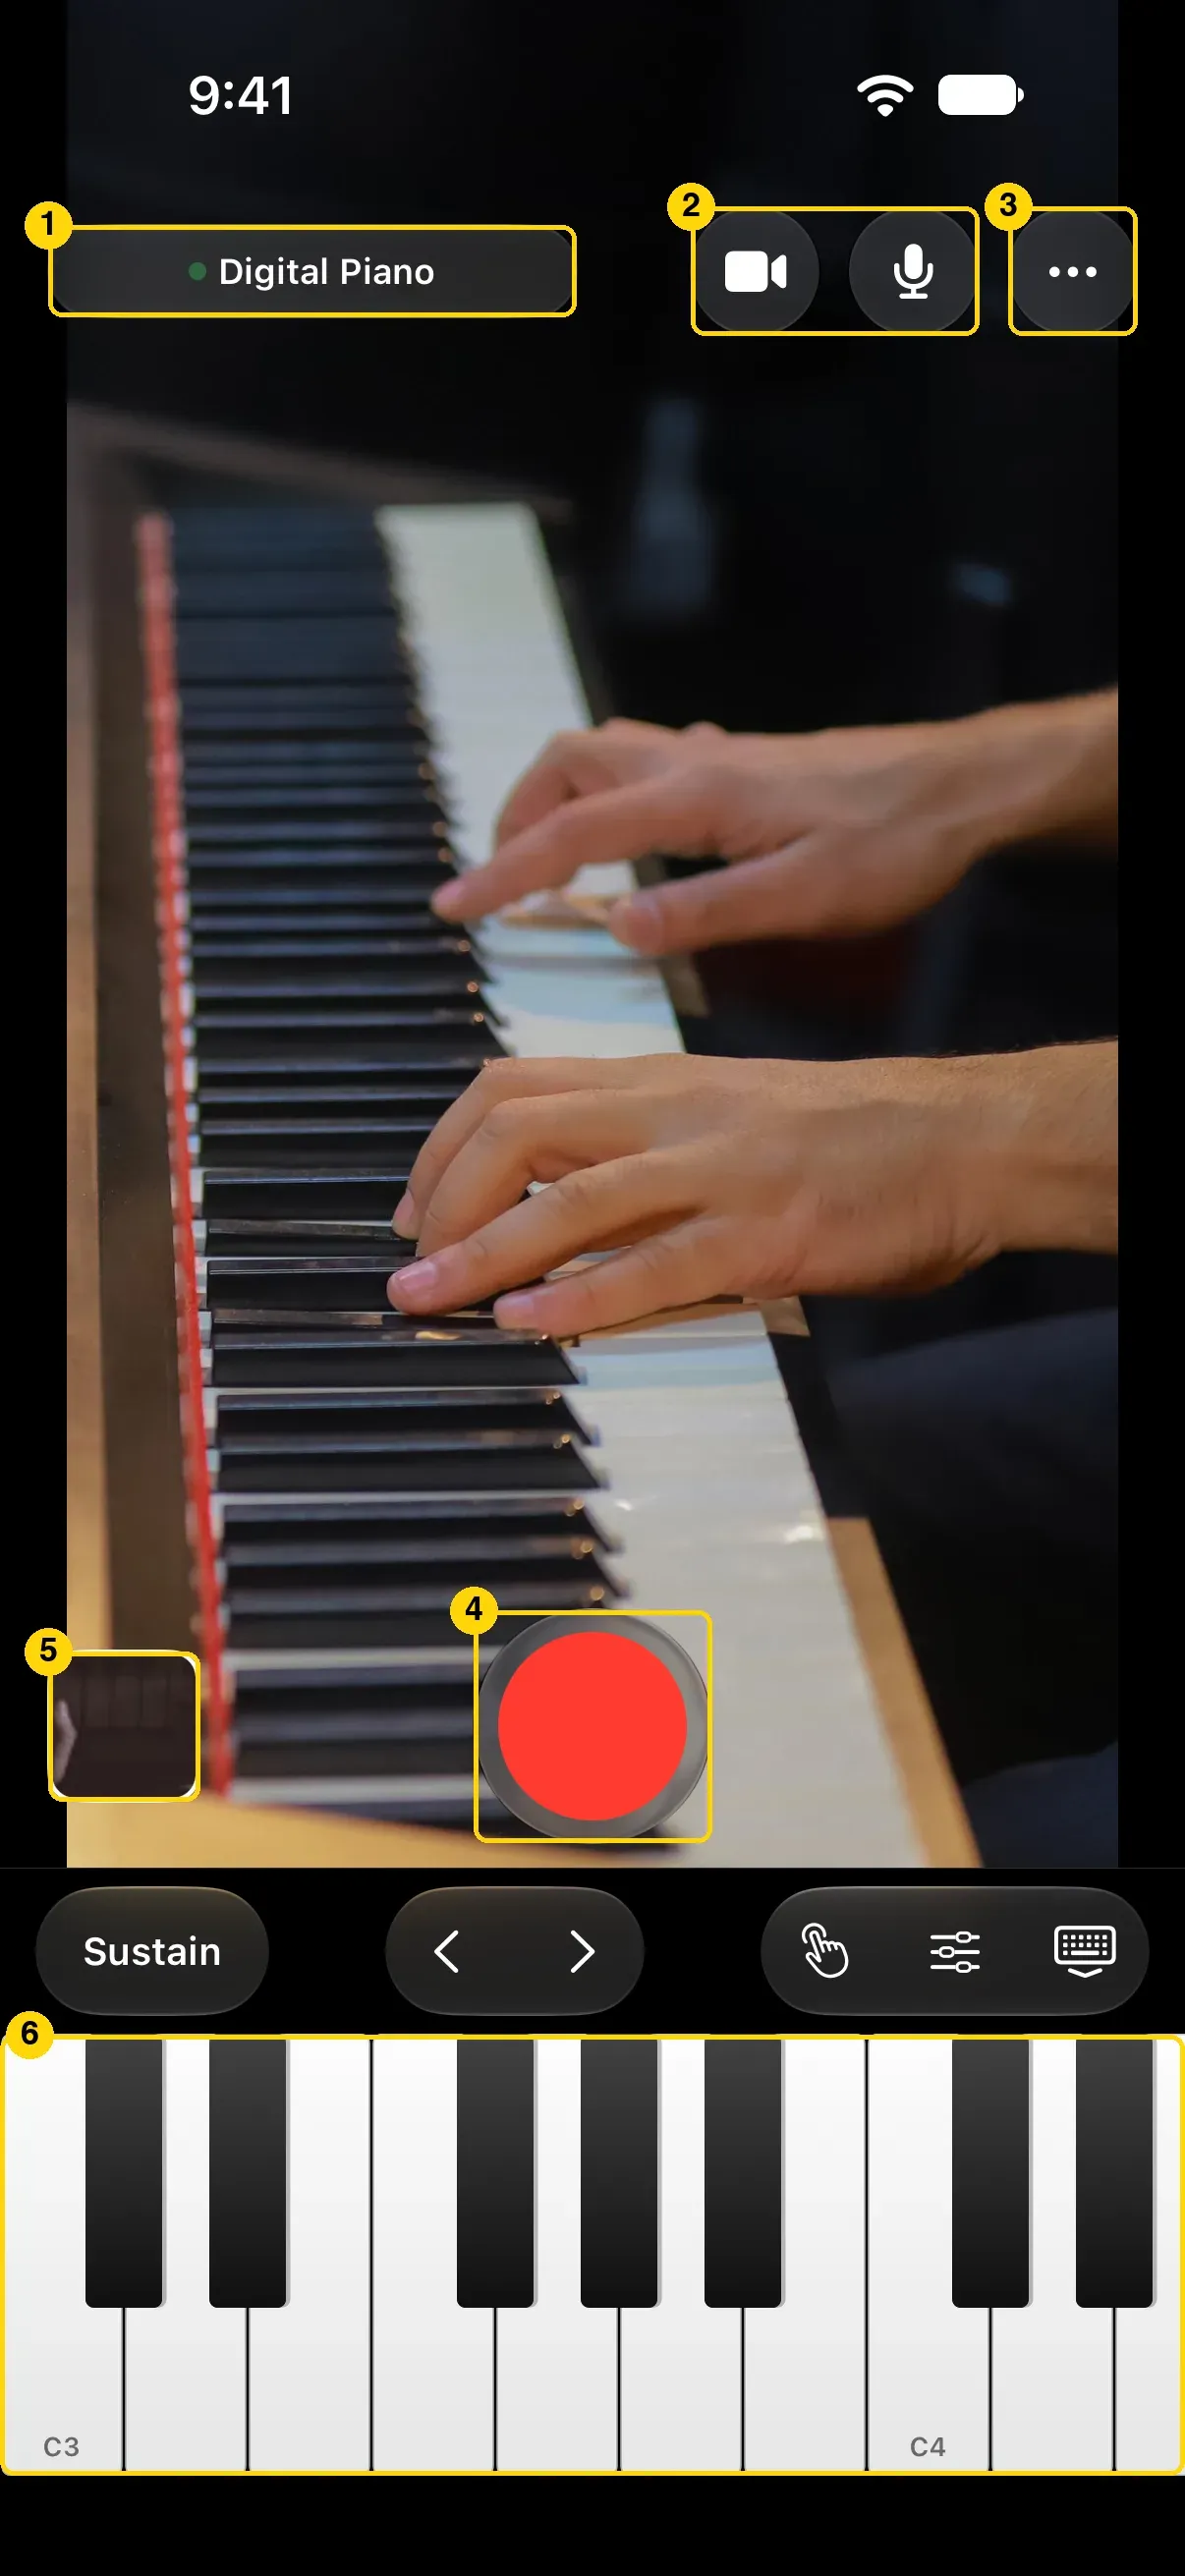
- MIDI device name: Shows the name of the connected MIDI device, or MIDI Not Connected. The activity indicator to its left is dark green while connected, lights up bright green the moment you play, and is orange when nothing is connected, when a Connect Your Digital Piano tip may also appear. Tap it to open the MIDI Input screen.
- Camera and microphone buttons: Turn the camera and microphone on or off. A button turns red when it is off. They appear only when you aren’t recording.
- More: Opens a menu for sound and keyboard display, camera and microphone selection, and Settings. You can open this help from Help in Settings.
- Record button: Switches between Start Recording and Stop Recording.
- Thumbnail: Your most recent take. Tap it to open the Library.
- Keyboard: A keyboard you can play with your fingers, so you can record without a MIDI keyboard.
With the back camera, a magnification button is also shown. It shows the current magnification, and tapping it switches to the next lens. See Set focus, brightness, and zoom.
What changes while recording
When you start recording, the screen changes.
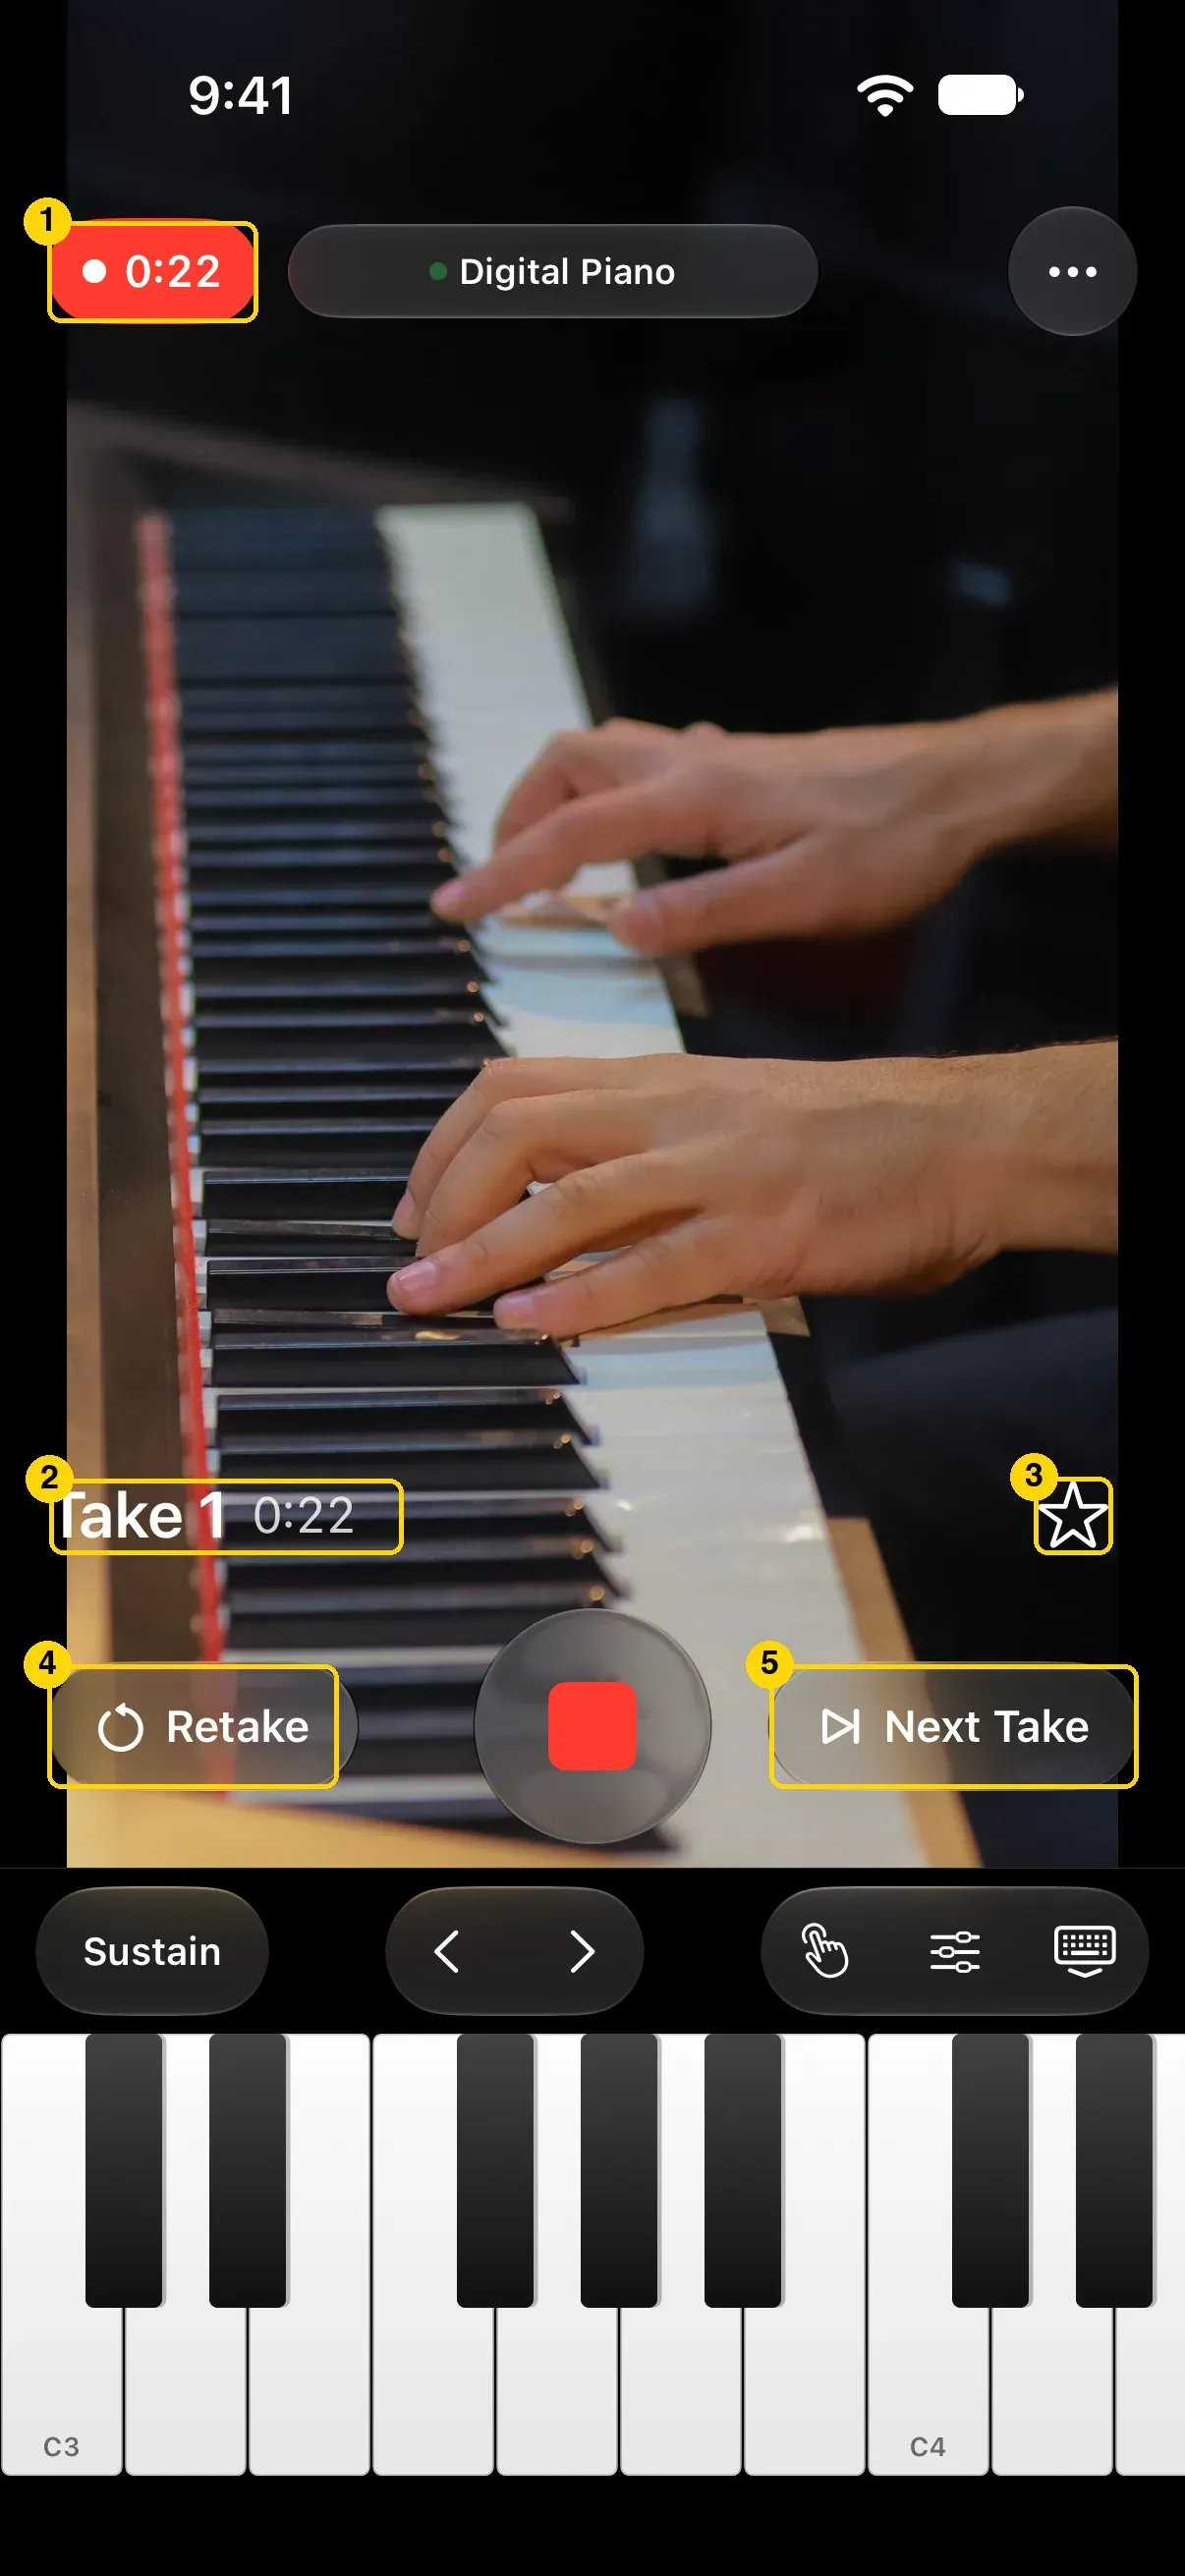
- Elapsed recording time: The time since you started recording.
- Current take: Shows the take name and its length.
- Star button: Tap it to add a star to the current take.
- Retake: Discards the current take and records it again under the same take name.
- Next Take: Starts the next take without stopping the recording.
Was this article helpful?
Choose a reason
Thank you for your feedback.
If you still need help, use the contact form.